• ascnc@asianstarcnc.com

How to Build Your Own Copper Wire Winding Machine: A Step-by-Step Guide

If you're looking for a way to save time and money on your DIY projects or small-scale manufacturing endeavors, building your own copper wire winding machine is an excellent solution. This versatile tool can help you create tightly wound coils for transformers, motors, and other electrical devices. In this guide, we'll walk you through the process of building your own copper wire winding machine, providing detailed instructions and helpful tips along the way. With a bit of patience and some basic tools, you'll have a fully functional winding machine up and running in no time.

Materials and Tools You'll Need

Before we dive into the building process, let's gather all the necessary materials and tools. Here's a list of items you'll need:

1. A sturdy wooden or metal base (approximately 12" x 12")

2. Two metal or wooden supports (approximately 12" in height)

3. A DC motor with a suitable power supply

4. A spool holder for the copper wire

5. A wire guide (a small pulley or eyelet)

6. A counter to track the number of turns (optional)

7. A hand crank or drill (for manual winding)

8. Screws, nuts, and bolts

9. Copper wire of your desired gauge

10. Electrical tape or heat shrink tubing

11. A power switch

12. A multimeter (for testing)

13. Basic tools: screwdrivers, pliers, a drill, a saw, and a ruler

Step 1: Assemble the Base and Supports

Start by cutting your base and supports to the appropriate size. If you're using wood, make sure to sand the edges to prevent splinters. Attach the supports to the base using screws, ensuring they are parallel and firmly secured. The supports will hold the motor and spool holder, so it's essential that they are sturdy and properly aligned.

Step 2: Mount the Motor and Spool Holder

Next, attach the DC motor to one of the supports, making sure it's level and secure. The motor's shaft should face the other support, where you'll mount the spool holder. Attach the spool holder to the opposite support, ensuring it's at the same height as the motor's shaft. This will allow the copper wire to unwind smoothly from the spool and onto the motor's shaft.

Step 3: Install the Wire Guide and Counter

To guide the copper wire onto the motor's shaft evenly, you'll need a wire guide. Attach a small pulley or eyelet to the base, positioning it between the motor and spool holder. Make sure the wire can pass through the guide smoothly and without any obstructions.

If you'd like to keep track of the number of turns, you can install a counter at this stage. There are various types of counters available, from simple mechanical devices to more sophisticated digital options. Choose one that suits your needs and budget, and follow the manufacturer's instructions to install it.

Step 4: Set Up the Power Supply and Switch

Connect your motor to a suitable power supply, ensuring the voltage and current ratings match the motor's specifications. Install a power switch between the motor and power supply, allowing you to easily turn the machine on and off. Make sure all connections are secure and well-insulated to avoid electrical hazards.

Step 5: Attach the Hand Crank or Drill (Optional)

If you prefer manual winding, you can attach a hand crank or drill to the motor's shaft. This will give you more control over the winding process, allowing you to adjust the speed and tension as needed. Make sure the crank or drill is securely fastened to the shaft and doesn't slip during operation.

Step 6: Test Your Machine

Before using your copper wire winding machine, it's essential to test it for safety and functionality. Turn on the machine and observe the motor's rotation, ensuring it's smooth and consistent. Pass a short length of copper wire through the wire guide and onto the motor's shaft, checking that it winds evenly and without any snags.

Step 7: Wind Your Copper Wire

Now that your machine is ready, you can start winding copper wire. Secure the copper wire spool onto the spool holder and thread the wire through the wire guide. Attach the wire to the motor's shaft using electrical tape or heat shrink tubing. Turn on the machine and carefully monitor the winding process, adjusting the speed and tension as needed. If you're using a counter, make sure it's accurately tracking the number of turns.

Conclusion

Building your own copper wire winding machine is a rewarding project that can save you time and money on various DIY and small-scale manufacturing tasks. By following this step-by-step guide, you'll have a reliable and efficient winding machine that's tailored to your specific needs. With a bit of patience and some basic tools, you can create a valuable addition to your workshop or manufacturing space.

CNC Copper Machining

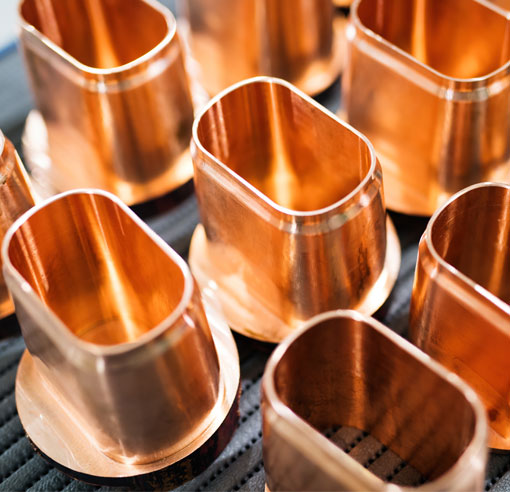
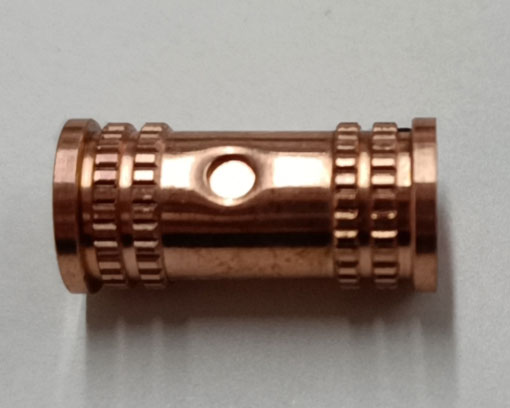
CNC Machining Copper Material is good electrical conductivity, thermal conductivity, it is soft and good for machining as it has high plasticity, it is easily and rapidly to carry out desired shape as machining cutter can run faster than other steel materials, and also reach high precision.

Copper has a shiny reddish-orange finish, which varies slightly based on the surface finish method. Copper can be media-blasted and polished to achieve many different cosmetic surface finishes.

CNC Machining Copper Parts are widely used in the manufacture of electrical wires, cables, electric brushes, electric spark, and other electrical devices and products.

CNC Copper Machining

Benefits of CNC Copper Machining

1/ CNC Machining Copper Parts are excellent in electricity conductivity, supporting very good electric function

2/ CNC Machining Copper Parts are soft, easy to design into different shape, also suitable for many processes

3/ Copper is easy for cutting and machining, its production efficiency is much higher than steel series

4/ Good propriety for bending and shaping

5/ Heat transferring function very good, high resistance, temperature stability, long durable using

6/ Stable surface, non-surface treatment is durable, electroplating is also used on copper parts

CNC Copper Machining

Composition And Property of CNC Machining Copper

Copper Property Alloy Type Content Melting Point Hardness Tensile Strength Density
Cu-based Zn, Sn, Si, Al, Ni 1083°C HB35-45 Low 8.9 g/cm3

Common Materials Code of CNC Machining Copper

Copper Alloy Workable Processes Surface Finishing for Copper Parts Materials Code
CNC Turning, CNC Milling, CNC Drilling, Molding, Forging, Fabrication, Welding, etc. Passivation, Anodizing, Plating, Chemical Polishing, etc. Copper 110
Copper 101
Copper 145
other more Copper Alloy

Asianstar: Professional CNC Machining Supplier

From year of 2005, Asianstar Company establish the CNC Machining Factory in Guangdong Province, China.
We mostly provide CNC Turning, Milling, Drilling, Grinding, and Multi Machining processes service on various materials.
With the Belief of becoming a key supplier in the supply-chain of Precision Components, we strictly control our product quality, keep high precision on our components production, buildup the whole-process QC System and submit the satisfaction for every order.
By long term development, we have buildup partnership with world-wide clients, supporting our partners in Designing, Optimizing, Producing and Testing on each type of components.

PARTNERSHIP BRANDS WE ARE SUPPORTING

Advantages of Asianstar CNC Copper Machining

Strong Facilities

Asianstar many CNC and stamp machines allow us to produce various copper parts, different sizes, and structures are all well done by suitable solution

Long-term Skills

Asianstar professional engineers team has experience from year 2005, producing copper parts for world wide electric products

Stable Quality

Asianstar QC system and QC tools guarantee our products are perfect result. We have procedures to control copper parts quality during production

Competitive Price

Asianstar aim to buildup partnership with clients, always choose best suitable facilities to carry out the components in competitive prices

METAL AND PLASTIC CNC MACHINING MATERIALS

CNC Brass Machining

Brass

CNC Machining Brass material is used for wide range components, we support clients to produce a variety of parts such as gears, locks, electronics, pipe fittings, etc.

CNC Copper Machining

Copper

CNC Machining Copper material is soft and easy to machining on different shape of components. We mostly produce copper components for electric devices by machining and stamping

CNC Aluminum Machining

Aluminum

CNC Machining Aluminum materials is one of our most used materials. We support clients to turning, drilling or milling on aluminum material from size 0.5mm to 470mm

CNC Stainless Steel Machining

Stainless Steel

CNC Machining Stainless Steel are common material for wide range components, we produce Stainless Steel turning parts, milling parts, high smoothness components, etc.

CNC Titanium Machining

Titanium

CNC Machining Titanium material brings components superb features, we use titanium to produce high precision work-piece for clients from aircraft, aerospace, medical devices

CNC Plastic Machining

Plastic

Our CNC Machining Plastic materials includes ABS, HDPE, LDPE, Nylon, POM, Peek, Polycarbonate, etc. We produce them in high precision and high smoothness.

FAQ GUIDE

  • Q1.Do you support ODM/OEM?

    Yes, we support ODM/OEM, we provide custom-made service for clients or even support clients on designing or improving

  • Q2.Do You Have Stock
  • Q3.What Is Your Production Capacity?
  • Q4.Where Is Your Factory?
  • Q5.Can You Provide Samples?
  • Q6.How About Your After-sales Service?
Get The Best Quotes Now

Tag: