Introduction
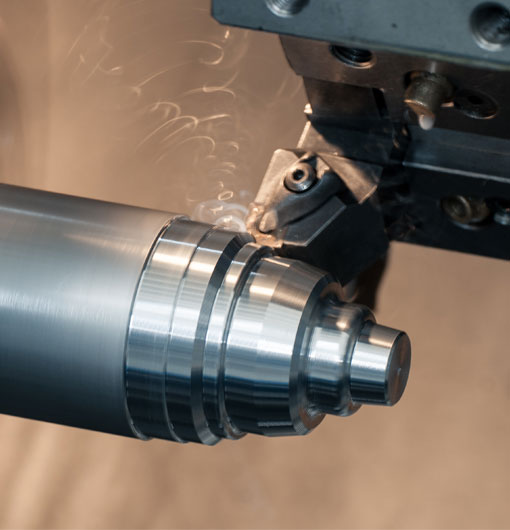
In the fast-paced world of computer numerical control (CNC) machining, CNC simulators have emerged as a valuable tool for enhancing the efficiency and productivity of shops worldwide. These powerful software applications allow machinists to emulate the behavior of their CNC machines in a virtual environment. One of the fundamental elements in CNC machining is turning, and mastering the use of CNC simulators for this critical process can yield significant benefits.
This comprehensive guide covers the essentials of CNC simulator turning, including tips, tricks, and techniques to enhance your performance and make the most of your CNC simulator experience. We'll discuss how to choose the right simulator, understand the functions of various turning tools, optimize machining parameters, and much more.
Choosing the Right CNC Simulator
The first step in mastering CNC simulator turning is selecting the software that best fits your needs. The market offers a variety of options, each with its own advantages and limitations. When evaluating CNC simulators, consider factors such as:
1. Compatibility with your CNC machine: Ensure that the simulator works seamlessly with your specific make and model of CNC machine for accurate programming and simulation.
2. Realism: The best simulators offer a realistic representation of your CNC machine's behavior, taking into account factors such as machine dynamics, cutting forces, and tool deflection.
3. Ease of use: A user-friendly interface and intuitive controls are crucial for efficient simulation and learning.
4. Analytics and reporting features: Advanced analytics and reporting capabilities can provide valuable insights, helping you to identify areas for improvement and fine-tune your CNC processes.
Understanding Turning Tools
In order to effectively use a CNC simulator for turning operations, it's essential to become familiar with the various turning tools and their functions. Some common turning tools and their applications include:
1. Roughing tools: Also known as roughing inserts, these tools are designed for heavy material removal and use robust cutting edges to quickly remove large amounts of material.
2. Finishing tools: Finishing inserts have a sharper cutting edge and a smoother surface to achieve a high-quality surface finish on the workpiece.
3. Grooving tools: Grooving inserts are used for creating grooves or notches in a workpiece and are available in various geometries and sizes, depending on the groove dimensions required.
4. Threading tools: Threading inserts are designed to create internal or external threads on a workpiece and require precise programming for accurate thread profiles.
Optimizing Machining Parameters
To achieve the best results in CNC simulator turning, it's important to optimize your machining parameters, which include cutting speed, feed rate, and depth of cut. These parameters can significantly impact part quality, tool life, and machining time and should be adjusted based on factors such as tool material, workpiece material, and desired surface finish.
1. Cutting speed: Determine the optimal cutting speed based on the material and tool being used. Increasing cutting speed can reduce the time required to machine a part but may generate excessive heat and shorten tool life. Aim for a balance between speed and tool longevity.
2. Feed rate: Adjust the feed rate to ensure efficient material removal without causing excessive tool wear or chattering. Higher feed rates are generally used for roughing operations, while lower feed rates are more suitable for finishing operations.
3. Depth of cut: The depth of cut should be selected based on the size and strength of the tool and the workpiece material. A larger depth of cut allows for faster material removal but puts more stress on the tool.
Common Turning Scenarios in CNC Simulator
When practicing CNC simulator turning, it's important to familiarize yourself with common turning scenarios that you may encounter in a real workshop. Some typical examples include:
1. Straight turning: The removal of material along the outer diameter of a cylindrical workpiece for achieving a specified diameter.
2. Taper turning: Taper turning involves machining a conical surface on a cylindrical workpiece by gradually reducing the diameter along the length.
3. Facing: In facing operations, material is removed from the face of a workpiece, creating a flat surface perpendicular to its rotational axis.
4. Drilling and tapping: Holes can be drilled into a workpiece using a CNC turning center, and threading can also be performed by incorporating a tapping head.
By understanding these scenarios and practicing them in your CNC simulator, you'll be well prepared to effectively tackle turning tasks in a real workshop setting.
Expand Your Knowledge and Skills
Mastering CNC simulator turning is an ongoing process, and the best way to improve your skills is through continuous practice and learning. As well as users who are just starting, experienced machinists can also benefit from experimenting with new techniques and methods in a risk-free, virtual environment.
By engaging with online forums, trade publications, and industry events, you can continue expanding your knowledge of CNC turning techniques and stay up to date with the latest trends in CNC simulation technology. The more you practice and learn, the better equipped you'll be to optimize your CNC simulator turning processes and achieve outstanding results in the real world.
cnc simulator turning


