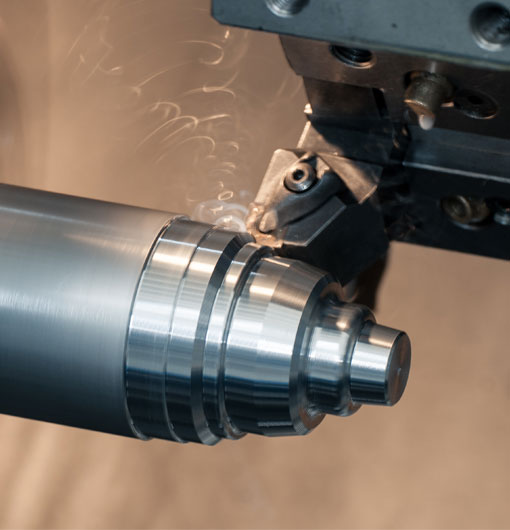
Taper turning is generally considered one of the more challenging operations on a CNC machine. Any professional operator will tell you how crucial it is to master this crucial operation. This blog aims to delve deep into the world of CNC taper turning and provide you with comprehensive knowledge curated from the extensive experiences of expert operators. So, let*s get started on an enlightening journey of taper turning.
Understanding CNC Taper Turning
A taper is created when a straight line cuts a section of the surface of a solid cone. This is achieved by consistently varying the diameter of the workpiece over the length being machined. In the world of CNC machining, this function is performed by taper turning. It could be either external, where the tapered surface is on the outside of the workpiece, or internal, where it's on the inside. There are multiple methods to achieve it, such as the method of taper turning, compound rest, form tool, taper attachment, and the tailstock set over method. However, as CNC machines typically do not have a taper turning attachment, there is a different procedure to create a taper. Herein, the secret lies in the machine's capability to move multiple axes simultaneously.
Delving into the Details
Let's concentrate on the CNC process specifically. Here, taper turning involves programming the machine to move the Z and X axes simultaneously while matching the desired taper's angled line. The majority of modern lathes also use a G-code function, recognizing the need for an angled tool path and moving the axes accordingly.
Setting up a CNC machine for taper turning might sound complex, but it's straightforward once you familiarize yourself with the process. You're required to set the X and Z axes to zero. It's also crucial to ensure the tool nose radius is set to zero, which can be achieved by using a G50 command in MDI mode or by manually setting the tool nose radius to zero. After setting the zero points and determining your taper specifications, you will be ready to program the machine.
Programming for CNC Taper Turning
Creating the program is perhaps the most critical part of the process. It sets the stage for your success. To determine the taper specifications, you will need to calculate the taper per inch or per foot. For a 30-degree angle, the taper per inch would be 0.577, while for a 45-degree angle, it would be 1.000.
Let's consider an example for practical understanding, suppose you want to turn a 5-inch long taper with a large diameter of 2 inches at the chuck end and a small diameter of 1-inch at the tailstock. The typical move command for this would look something like "G1 X2.000 Z-5.000 F.005". The F command specifies the feed rate.
When turning the taper, it is essential to back the tool off from the part before feeding out in the Z-axis.
Managing the Challenges
Despite its effectiveness, the CNC method can present its own set of challenges. The common issues faced can range from difficulty in setting up the taper specifications in the program, concerns about inaccuracies, to issues with the machine's positional tolerances.
However, these hurdles merely constitute the learning curve and can be mitigated with experience, patience, and the right knowledge. The primary formula to keep in mind during taper turning, to prevent mistakes, is Z-move = length / cos (angle).
Remember, the key to successful taper turning lies in meticulous calculation, precise programming, and observant operation.
Further Exploration
While the basics of CNC taper turning are covered here, the realm of CNC machining never ceases to amaze with its extensive possibilities. You can experiment with varying the feed rates or trying different types of cutter paths. Let your creative side begin exploring the versatile world of CNC machining. Let this blog be the stepping stone to many more successful taper turns in your future endeavors.
May the journey from taper turning novice to expert be a fruitful and enlightening one!
cnc taper turning


