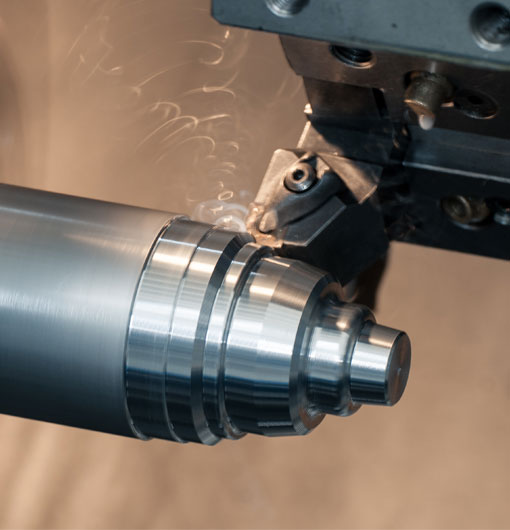
Acrylic, the popular transparent plastic, has a reputation for being both versatile and resilient. As such, it has become a favoured material within varied industries from retail to aerospace. One of the exciting fields where acrylic usage has gained significant momentum is Computer Numerical Control (CNC) turning. CNC turning acrylic presents its unique set of challenges and advantages. This blog aims to delve into this process to provide valuable insights.
The Promise of Acrylic in CNC Turning
Acrylic's transparent nature allows for the possibility of visually impactful designs, be it clear window panes or colourful retail displays. Given its characteristics of lightweight, superior optical clarity, resistance to weather changes and chemicals, it's no surprise that it has a myriad of applications.
CNC turning becomes significantly essential when it comes to creating custom pieces or intricate designs on acrylic. The precision delivered by this method is undoubtedly unparalleled - whether it's for creating prototypes, small-scale productions, or full-scale industrial products.
CNC Turning: An Overview
Before we venture into how acrylic fits in this puzzle, let's discuss what CNC turning entails briefly. CNC turning involves rotating the workpiece while a cutting tool moves in a linear fashion. This process "turns" the piece, hence the term "turning". CNC offers precision and speed, thereby making it a favoured method for various materials, including acrylic.
The Process of CNC Turning Acrylic
Now let's move on to the specifics of CNC turning when it comes to acrylic. The steps can be outlined as follows:
1. Designing:Like with any process, it begins with a design. The concept should be compatible with CNC turning. CAD software helps craft blueprints of the design.
2. Programming:The CAD produced file is then converted into a language that the CNC machine can understand - typically G-code. CNC machinists is essential in this step for conveying the design plan to the machine accurately.
3. Fixturing:The acrylic piece is then fixtured to keep it in place in the machine.
4. Machining:Once secure, the CNC machine begins turning and cutting the acrylic piece in accordance with the provided program.
5. Finishing:After the desired shape is achieved, the edges are smoothed out, and the necessary polishing is done. The piece is inspected and set aside.
6. Quality Control:This process is repeated across multiple pieces while assuring quality compliance and minimal deviation.
Tips and Tricks: CNC Turning Acrylic
Tooling Factor:The choice of tooling is critical when it comes to CNC turning acrylic. Using a sharp, single point turning tool can result in a smooth surface finish.
Speed and Feed:The cutting speed and feed rate have a significant effect on the final product. A slow cutting pace and low feed rate are usually recommended for acrylic to avoid overheating and consequent melting or warping.
Coolant Use:While turning, chips (scrap material) are produced. Coolants help in managing the chips and also minimise heat production.
Post-processing:Buffing and flame polishing give finished pieces a glossy look, enhancing the natural aesthetics of acrylic.
The complexity and preciseness of CNC turning demand, not just rigorous planning, but also a keen understanding of the material. Acrylic's qualities make it highly suitable for varied applications. Moreover, appropriately leveraged CNC turning can turn raw acrylic pieces into beautiful, precise, and durable products.
This article has outlined the various steps involved in the CNC turning process for acrylic, the considerations to make, and the tips to bear in mind to achieve the best results. As further advancements are made in the field of CNC technology, we can expect to unearth even more possibilities. In such an evolving industry, keeping updated with the know-how and continually refining our methods can yield some truly impressive outcomes.
cnc turning acrylic


