Sheet metal fabrication is an essential skill for anyone working in the HVAC or metalworking industry. One of the most common tasks is fabricating an elbow from sheet metal. This versatile joint is used in a wide range of applications, from ductwork to piping systems. In this comprehensive guide, we will walk you through the process of fabricating an elbow from sheet metal, step by step. With over 1000 words of detailed instruction, you'll be well on your way to mastering this essential skill.
Understanding the Basics of Sheet Metal Fabrication
Before we dive into the specifics of fabricating an elbow, it's essential to have a solid understanding of sheet metal fabrication. This process involves cutting, bending, and shaping metal sheets to create various components and structures. There are several techniques and tools used in sheet metal fabrication, such as shearing, laser cutting, and press brake forming.
When working with sheet metal, it's crucial to consider factors like material type, thickness, and desired shape. For example, stainless steel is more challenging to work with than aluminum due to its increased strength and resistance to deformation. Additionally, thicker materials require more force to bend and shape, so it's essential to use the appropriate tools and techniques.
Gathering the Necessary Tools and Materials
To fabricate an elbow from sheet metal, you will need the following tools and materials:
Sheet metal (preferably galvanized steel or aluminum)
Metal shears or a plasma cutter
A press brake or a sheet metal brake
A protractor or angle finder
A straight edge or ruler
A marker or scribe
Safety equipment (gloves, safety glasses, etc.)
Step 1: Determine the Desired Angle and Radius
The first step in fabricating an elbow is to determine the desired angle and radius. This information is essential for calculating the necessary dimensions and layout of the sheet metal. The angle of the elbow is typically measured in degrees, while the radius refers to the curvature of the bend. For example, a 90-degree elbow with a 6-inch radius would have a quarter-circle shape with a 6-inch distance from the center to the outer edge.
Step 2: Calculate the Necessary Dimensions
Once you have determined the desired angle and radius, you can calculate the necessary dimensions for the sheet metal. This process involves determining the length and width of the metal piece required to form the elbow. To do this, use the following formulas:
Length (L) = (Angle / 360) x (2 x π x Radius)
Width (W) = Diameter of the elbow + Material thickness
For example, if you are fabricating a 90-degree elbow with a 6-inch radius using 0.5-inch thick material, the calculations would be as follows:
L = (90 / 360) x (2 x π x 6) = 9.42 inches
W = (6 x 2) + 0.5 = 12.5 inches
Step 3: Mark and Cut the Sheet Metal
With the necessary dimensions calculated, you can now mark and cut the sheet metal. Using a straight edge and a marker or scribe, measure and mark the length and width on the sheet metal. Ensure that the lines are straight and accurate, as any deviations can result in an improperly formed elbow.
Once the lines are marked, use metal shears or a plasma cutter to carefully cut along the lines. Be sure to follow proper safety precautions, including wearing gloves and safety glasses.
Step 4: Bend the Sheet Metal
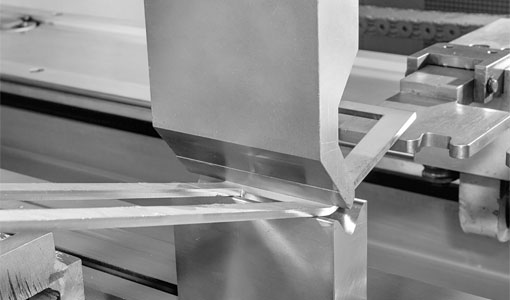
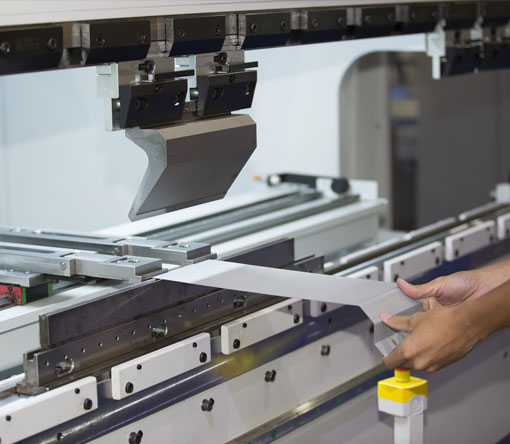
Now that the sheet metal is cut to size, you can begin the process of bending it to form the elbow. Using a press brake or a sheet metal brake, align the edge of the metal with the bending line on the brake. Apply pressure to the brake, bending the metal to the desired angle. Use a protractor or angle finder to ensure that the angle is accurate.
Repeat this process for each bend, working your way along the length of the metal piece. Be sure to maintain consistent pressure and angle throughout the process to ensure a uniform bend.
Step 5: Form the Elbow and Secure the Seam
Once the sheet metal has been bent to the desired angle, you can form the elbow by bringing the two ends of the metal piece together. The edges should align, creating a seam along the length of the elbow. To secure the seam, you can use a variety of methods, such as welding, riveting, or using sheet metal screws.
With the seam secured, your elbow is now complete and ready for installation. By following these detailed steps, you can expertly fabricate elbows from sheet metal for a wide range of applications. With practice and patience, this essential skill will become second nature, allowing you to tackle even the most complex sheet metal fabrication projects.
how to fabricate elbow from sheet metal


