Sheet metal intake fabrication is an essential skill for anyone interested in customizing, repairing, or restoring vehicles. With the right tools and techniques, you can create a high-quality and efficient intake system that will improve your vehicle's performance. In this comprehensive guide, we will walk you through the process of fabricating a sheet metal intake from start to finish, covering all the necessary steps and providing helpful tips along the way. Whether you're a seasoned professional or a DIY enthusiast, this guide will help you master the art of sheet metal intake fabrication.
Step 1: Gather Your Tools and Materials
Before you begin, it's essential to gather all the necessary tools and materials for the project. Here's a list of what you'll need:
Sheet metal (typically 16-gauge or 18-gauge)
Measuring tape
Straight edge
Metal shears or plasma cutter
Metal brake or bending tool
Welder (MIG or TIG)
Angle grinder with cutting and grinding discs
Sandpaper (80-grit and 120-grit)
Safety gear (gloves, goggles, and ear protection)
Step 2: Measure and Plan Your Intake Design
First, take accurate measurements of your engine's intake manifold and plan the design of your sheet metal intake. Consider factors such as the desired shape, size, and angle of the intake runners, as well as the overall dimensions of the intake plenum. Sketch your design on paper or use a computer-aided design (CAD) program to create a digital blueprint.
Step 3: Cut the Sheet Metal
With your design in hand, it's time to cut the sheet metal to the appropriate size and shape. Use a straight edge and measuring tape to mark the cutting lines on the sheet metal, and then carefully cut along these lines using metal shears or a plasma cutter. Be sure to wear appropriate safety gear during this step, as cutting metal can produce sharp edges and flying debris.
Step 4: Bend and Shape the Sheet Metal
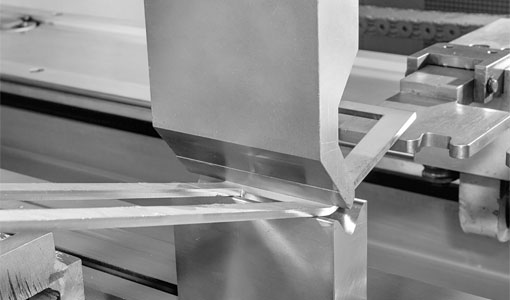
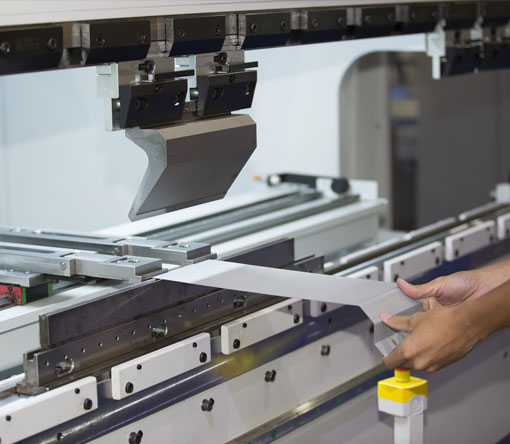
Once you've cut the sheet metal pieces, you'll need to bend and shape them to create the intake runners and plenum. Use a metal brake or bending tool to carefully bend the sheet metal along the desired lines, ensuring that the bends are smooth and consistent. For more complex shapes, you may need to use a hammer and dolly or an English wheel to form the metal.
Step 5: Weld the Intake Components Together
With your sheet metal pieces shaped and ready, it's time to weld them together to create the intake assembly. Using a MIG or TIG welder, carefully join the pieces along the edges, ensuring that the welds are strong and consistent. Take your time during this step, as a well-executed weld will result in a more durable and efficient intake system.
Step 6: Grind and Smooth the Welds
After welding the intake components together, use an angle grinder with a grinding disc to smooth out the welds and remove any excess material. Be sure to wear appropriate safety gear during this step, as grinding can produce sparks and flying debris. Once the welds are smooth, use 80-grit sandpaper to further refine the surface, followed by 120-grit sandpaper for a smooth finish.
Step 7: Test Fit the Intake Assembly
Before finalizing your sheet metal intake fabrication, it's crucial to test fit the assembly on your engine to ensure proper fitment and alignment. Make any necessary adjustments to the intake components, and then reassemble and test fit again until you're satisfied with the fit and function of your sheet metal intake.
Step 8: Paint or Powder Coat the Intake Assembly (Optional)
For a professional and durable finish, consider painting or powder coating your sheet metal intake assembly. This will not only improve the appearance of your intake system but also help protect the metal from corrosion and wear. Be sure to follow the manufacturer's instructions for your chosen paint or powder coating product, and allow the intake assembly to dry completely before installation.
Step 9: Install the Sheet Metal Intake
With your sheet metal intake fabrication complete, it's time to install the assembly on your engine. Follow the manufacturer's instructions for your specific engine and intake manifold, and ensure that all connections are secure and properly sealed. Once installed, start your engine and check for any leaks or performance issues.
And there you have it – a comprehensive guide to fabricating a sheet metal intake for your vehicle. With patience, practice, and the right tools, you can create a custom intake system that will improve your vehicle's performance and set it apart from the rest. Happy fabricating!
how to fabricate sheet metal intake


